
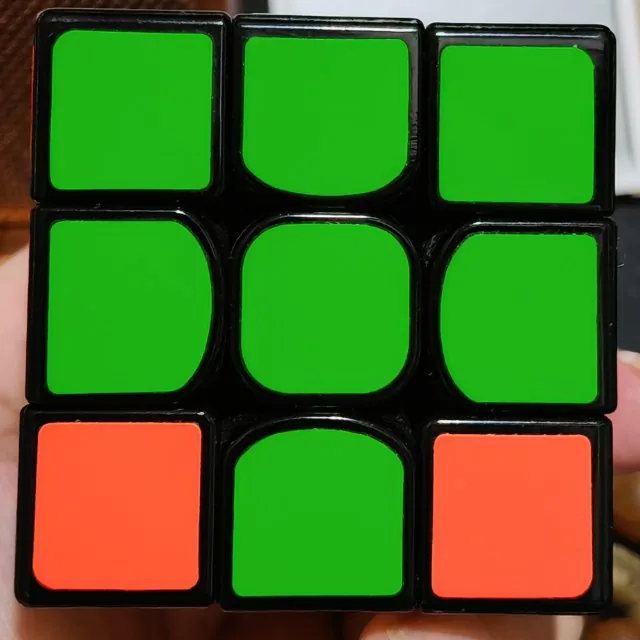
1Take one clear photo
Start with any face. Show all its squares, keep your hand out of the way and avoid reflections. Keep the lighting similar for all six photos.
FREE TO USE · NO SIGN-UP
Photograph six faces. Check your cube. Follow the moves in 3D.
One face at a time. Here is what to look for.
Start with any face. Show all its squares, keep your hand out of the way and avoid reflections. Keep the lighting similar for all six photos.
After each photo, watch one turn of the whole cube. The arrow disappears and the model stops on the face to photograph. Already turned? Take the photo; replay only if you need a reminder. Check colors after all six photos.
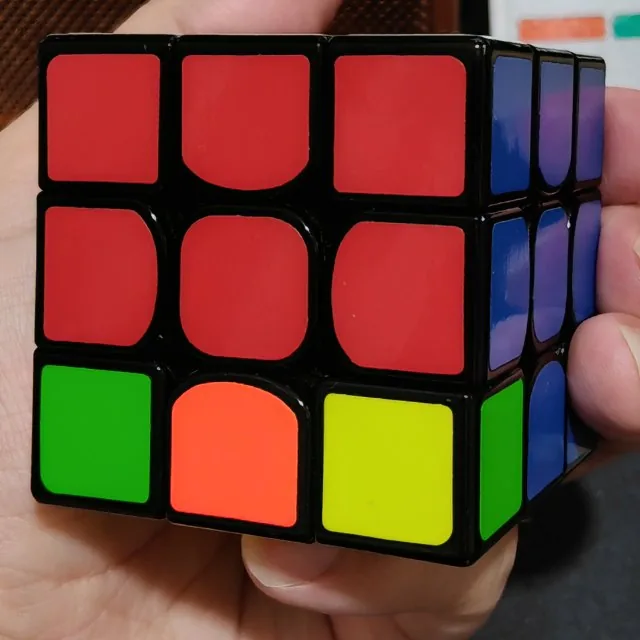
Fit the four dots around one face. Compare its colors with the live 3D cube and tap any wrong square to fix it.
A scrambled cube is easier to deal with when you can see what to do next. This free Rubik’s Cube solver turns the colors on your own cube into a solution you can follow, with photos, a live 3D preview and a complete list of moves. You can start straight away in the tool above; the notes below are here when you need a hand.
Use Camera / photos to take or upload all six faces in order. After each picture, follow the arrow in the viewfinder and the 3D turn beside it. Color confirmation waits until the whole set is ready, so you can keep shooting. You can also drag image files into the upload area, or revisit a numbered photo whenever you need to correct it.
Prefer to work by hand? Choose Paint in 3D, pick a palette color and tap the matching squares. Paint directly on the 3D cube. Drag the model to look around it; a short tap colors a square. Both methods edit the same cube. Photographing four faces and entering the other two manually is fine, provided you keep the face directions consistent.
You do not need an account, and there is no payment step before the solution. This online Rubik’s Cube solver runs in your browser. If you only want to see how it works, open the manual editor and try an example before copying your own puzzle.
For a new photo session, start with any face pointing toward you. You do not have to hunt for a particular center color first. Hold the cube still, show all nine squares and take the picture. The first face establishes the starting position for the guided sequence. If you already entered colors by hand, photograph the face shown in the preview so the two inputs line up.
After the photo is saved, the arrow and 3D cube show the next turn once. The arrow then disappears and the model holds still. If you have already turned, take the photo; replay only to watch the same instruction again. Copy it with the whole puzzle, keeping its layers still, and photograph the newly exposed face. Continue around the sides, then follow the prompts for the top and bottom. Once all six photos are recorded, review any uncertain colors and adjust outlines that need attention.
This order matters because six unrelated pictures do not tell a Rubik’s Cube solver which way each face was held. If you upload several photos together, select them in the guided shot order. Revisit a numbered thumbnail whenever you need to check a previous face; the preview turns toward that photo.
The photo input suggests an outline and samples the colors inside it. Treat that outline as a starting point. If it covers the background, misses an edge or includes part of another face, drag the four corner handles onto the outside corners of the face you want to read. You can enlarge, shrink or reshape the grid by moving those handles independently.
The grid can follow a trapezoid, which helps when the face was photographed at a slight angle. Watch where the internal lines fall: each small cell should cover one sticker, rather than a black divider or two adjacent squares. The suggested colors and live 3D preview update as you adjust the outline.
Perspective correction improves where the tool looks; it cannot recover a square hidden behind a finger or restore color lost in a bright reflection. If a photo is blurred or heavily tilted, retaking that face is usually quicker than making lots of corrections. Keep the camera roughly square to the face and leave a small margin around it.
Photograph all six faces first, without stopping to confirm colors. The tool compares the complete set and uses any saved color samples. If a shade is still uncertain or a color appears too many times, it asks you to tap a real sticker, such as orange. Impossible totals trigger a check even when a sample was saved earlier. That sample is reused across this cube’s photos. You can skip the helper and correct marked squares in 3D instead.
Photo recognition is a useful shortcut, but the Rubik’s Cube solver still needs you to check its suggestions. White may pick up a yellow cast from indoor lighting. A shiny red sticker can look orange, while orange in shadow can look red. A question mark means a color needs attention; a square without one can still be wrong.
Use even light and keep the lighting similar across all six photos. Avoid direct flash and strong reflections. Compare a questionable square with the real cube, choose its actual color from the palette and tap the square on the highlighted 3D face. Fixing one or two squares by hand is often easier than taking the whole set again.
After a complete 3×3 entry, each of the six colors should appear nine times. The counters help you spot excess or missing colors, but correct totals alone do not prove that the cube was copied correctly. Two swapped stickers can leave the totals unchanged. Always compare the arrangement as well as the numbers.
Before asking the Rubik’s Cube solver for moves, look around the assembled model. Compare each face with your puzzle. If a whole face appears sideways, use 90° left or 90° right to rotate the entered colors. This corrects how the photo was recorded; it is not an instruction to turn a layer on the real cube.
For an isolated error, paint just that square. Use Undo if an edit makes things worse. If you switch to another physical cube, choose Clear & enter a new cube instead of erasing every sticker individually. Your existing photos and manual corrections belong to the current puzzle, so starting fresh avoids mixing two different cube states.
Once every face is filled, choose Solve my cube. The tool checks whether the entered pieces can form a legal cube state and verifies the resulting solution before showing it. An error is a reason to review the entry, especially the top, bottom and face rotations. It does not automatically mean that your physical cube is broken.
Keep your real cube in the same starting orientation as the model when you begin the solution. Next move shows one turn to copy. Replay lets you watch that turn again, and playback speed gives you more time to follow it. You can pause between moves for as long as you need; finishing quickly is not the point.
You can drag the turn window to look around and use Reset view to return. The original F and U faces keep their meaning. It highlights the layer you need to move and labels it with an outside arrow, including back and bottom turns. Choose Preview this turn to watch without advancing the solution. Keep your real cube’s front and top in place; only the indicated layer turns.
You can also display the full sequence and the complete step overview. Each step includes its move notation, so you can read ahead, copy the formula or download the steps. Jumping to a later step changes the displayed position; your physical cube still needs every earlier move. Keep the on-screen position and the puzzle in your hands together.
If you make a wrong turn, pause immediately. Compare the last move with the animation and undo the physical mistake if you know what happened. If you have lost your place, enter the cube’s current colors and generate a new solution. Do not continue a formula for an earlier state and hope the cubes will catch up.
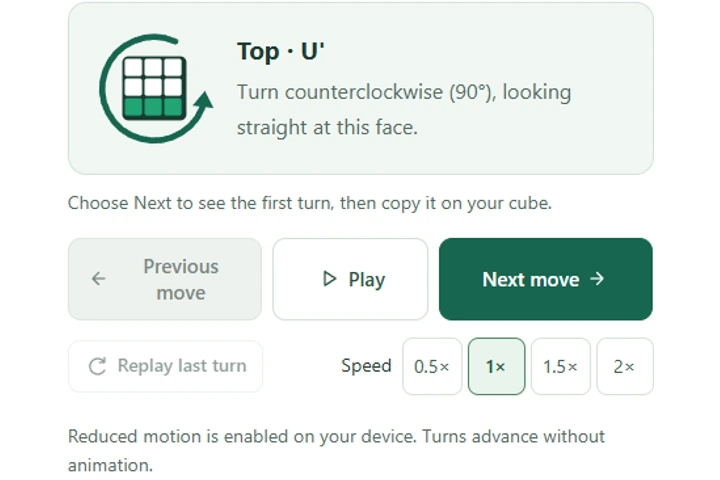
A Rubik’s Cube solver uses short move symbols so a long sequence is easy to read. R means right, L left, U top, D bottom, F front and B back. A letter by itself means a quarter turn clockwise, looking directly at the face being turned. The same rule applies to the back and bottom, even though you normally see them from another angle.
An apostrophe reverses the direction: R' means turn the right face counterclockwise. A 2 means a half turn: U2 turns the top face 180 degrees. For example, R U R' U' means right clockwise, top clockwise, right counterclockwise, then top counterclockwise. That example explains the notation; it is not a solution for every scrambled cube.
RRight clockwiseUTop clockwiseR′Right counterclockwiseU′Top counterclockwiseUse the homepage for a standard six-color 3×3. For a pocket cube, open the dedicated 2×2 solver, which supports photos and manual entry with four squares per face. A 2×2 has no fixed centers, so following a consistent orientation is particularly important. For a 4×4, use the separate solver with manual 3D color entry. Picture cubes and puzzles with a different piece structure are not supported.
The 3×3 Rubik’s Cube solver aims to produce a practical, verified sequence; it does not promise the shortest possible answer or a beginner layer-by-layer method. If your goal is to learn to solve without a tool, use the beginner guide alongside it. That guide explains checkpoints you can recognize and methods you can practise on future scrambles.
Start with any face. After each photo, follow the arrow and 3D turn to the next face. Keep the layers still. Photograph all six faces first, then review uncertain colors and adjust outlines if needed.
After the six photos, compare marked colors with the 3D preview. Drag the four corners if an outline is off, then tap incorrect colors to fix them. A saved color sample is reused across this cube’s photos. You can revisit or replace any face.
Yes. Choose Paint in 3D to fill or correct any square. Photos and manual input edit the same cube, so you can photograph some faces and fill the rest by hand. Your colors and photo adjustments stay together when you switch.
The solver is free, with no sign-up. Photos and colors are processed in your browser. Small photo previews are saved on your device while you work. Your photos, corrections and solution progress stay together until you choose Clear & enter a new cube.